MAX Applovin Adapter Integration
This document gives you a step-by-step guideline for AppLovin MAX Adapter integration with Appnext SDK as a custom SDK ad network.
Step 1: Sign to MAX Dashboard
Sign up to MAX Dashboard or sign in your account.
Step 2: SDK key
In the MAX Dashboard, go to General > Keys:
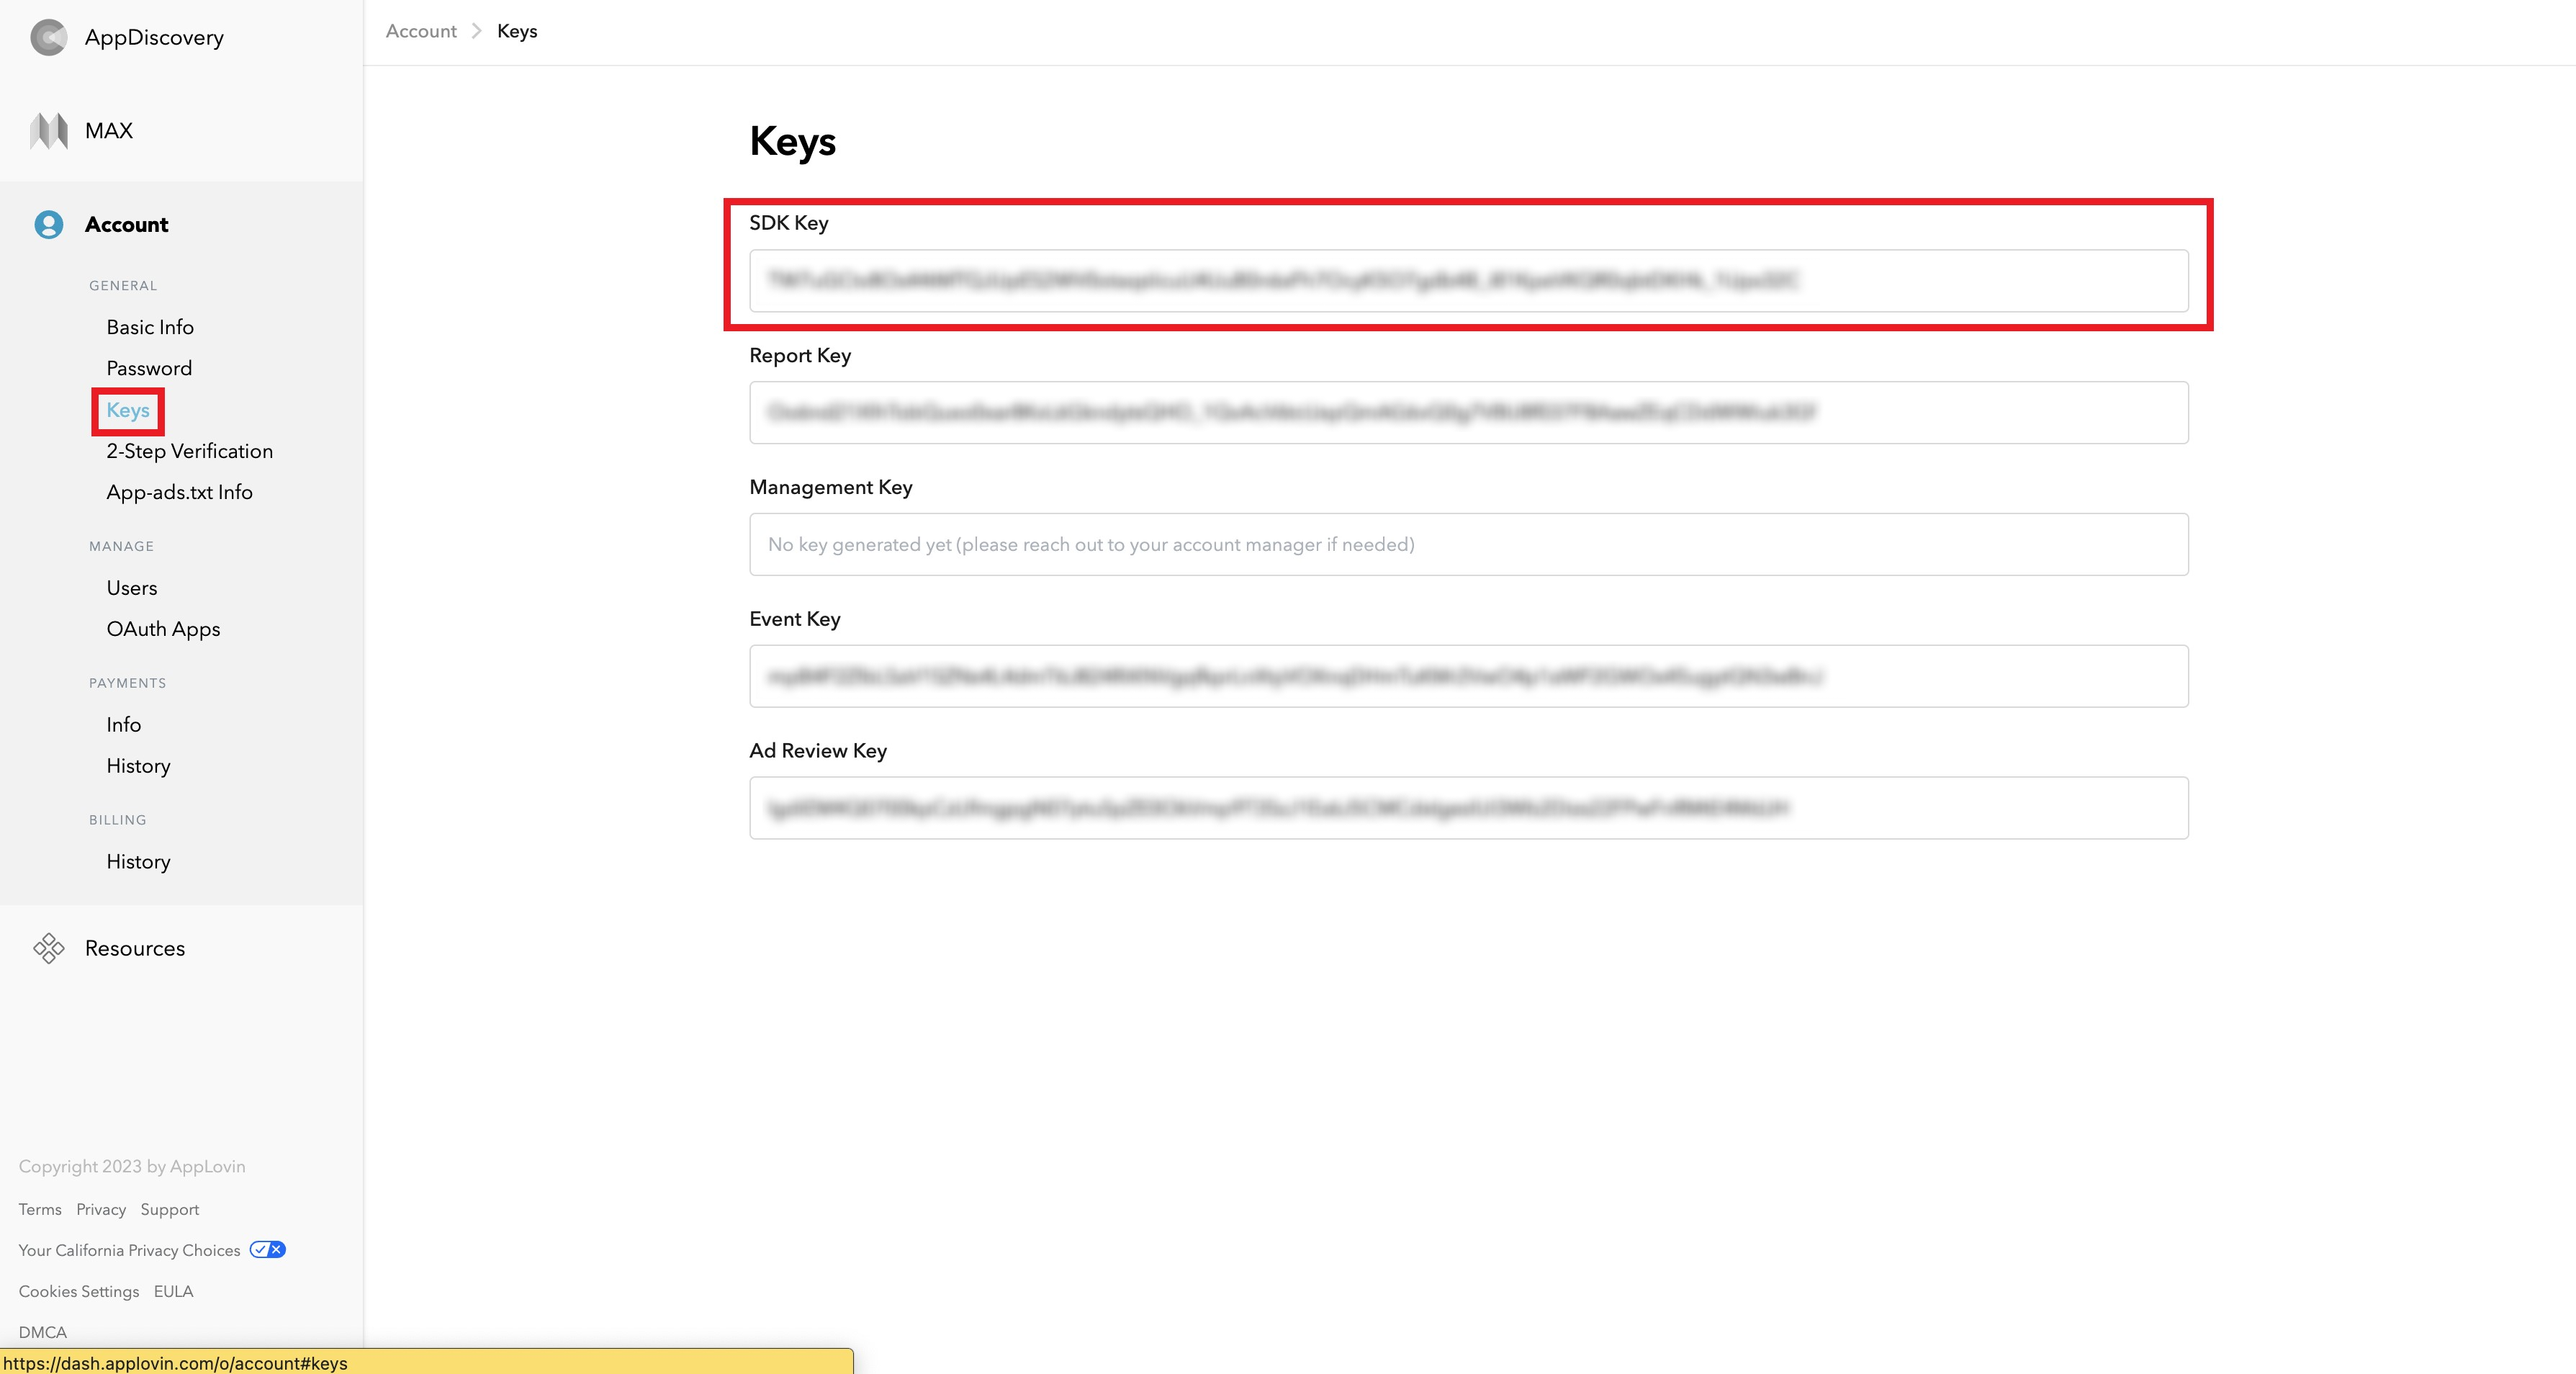
Copy the ‘SDK key’ string and implement this key in your app Manifest:

Step 3: Add Custom SDK network
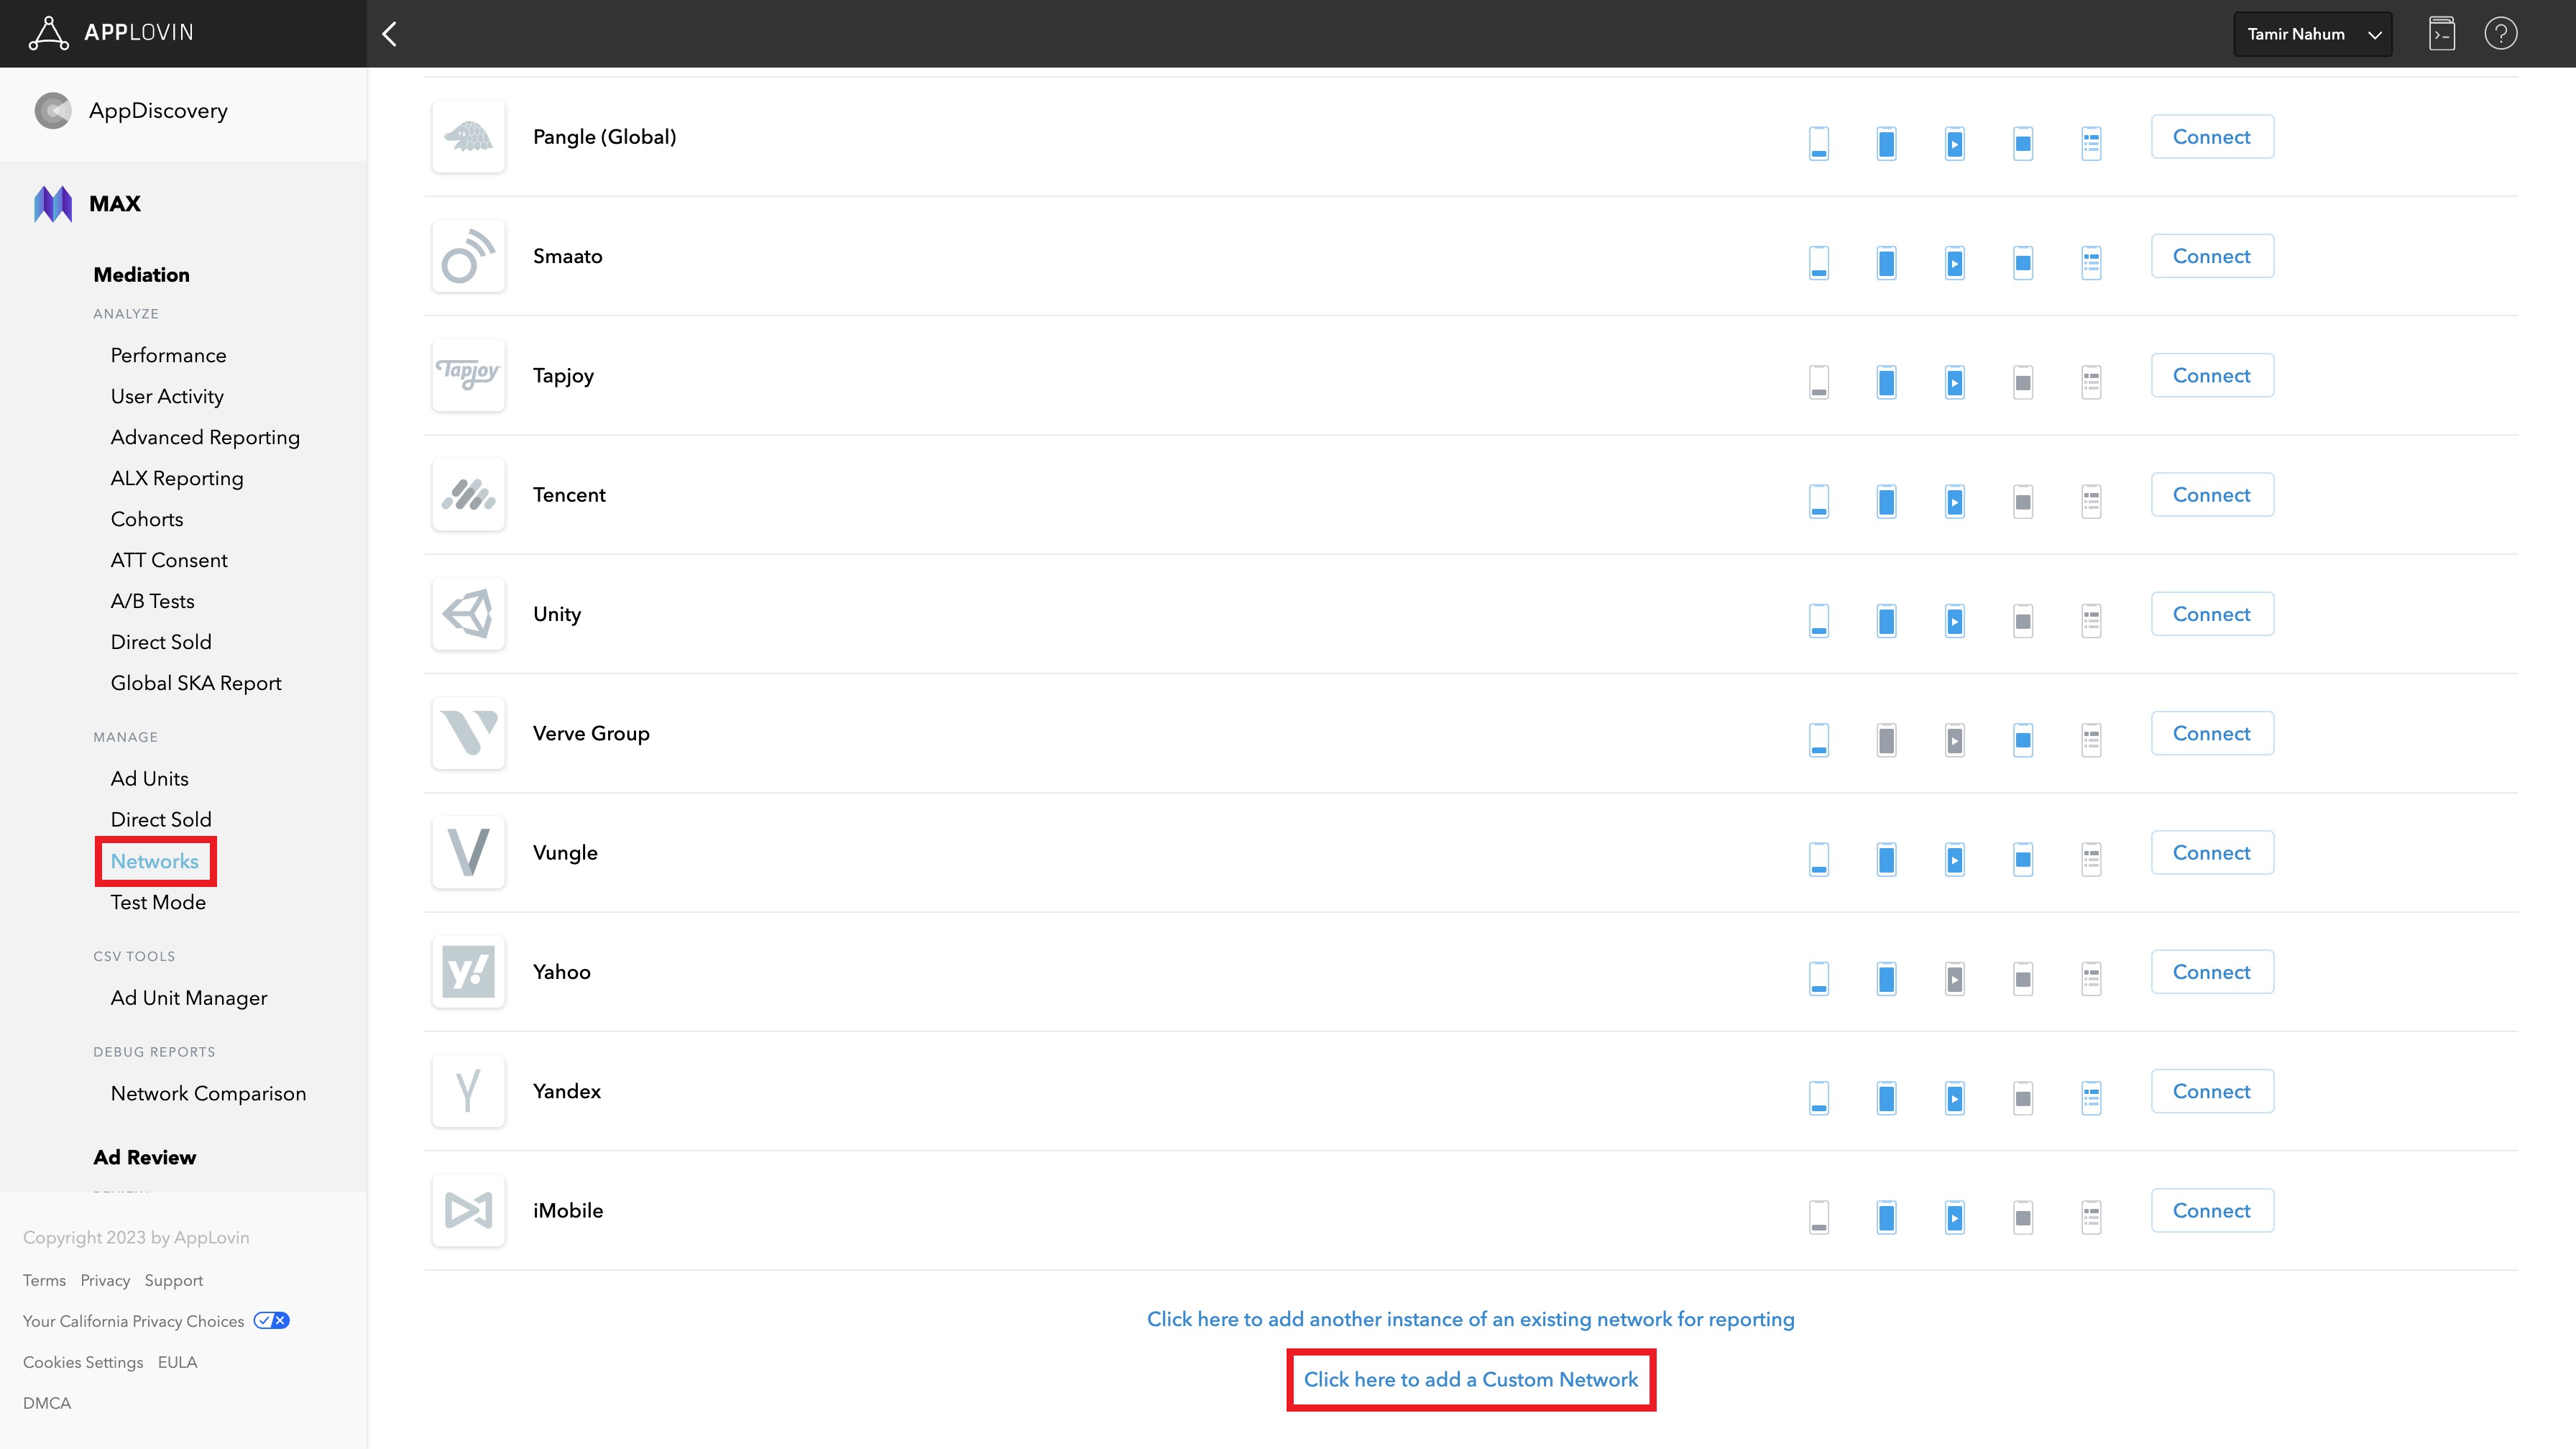
Select MAX > Mediation > Manage > Networks, and then click the Click here to add a Custom Network button. The Create Custom Network page appears.
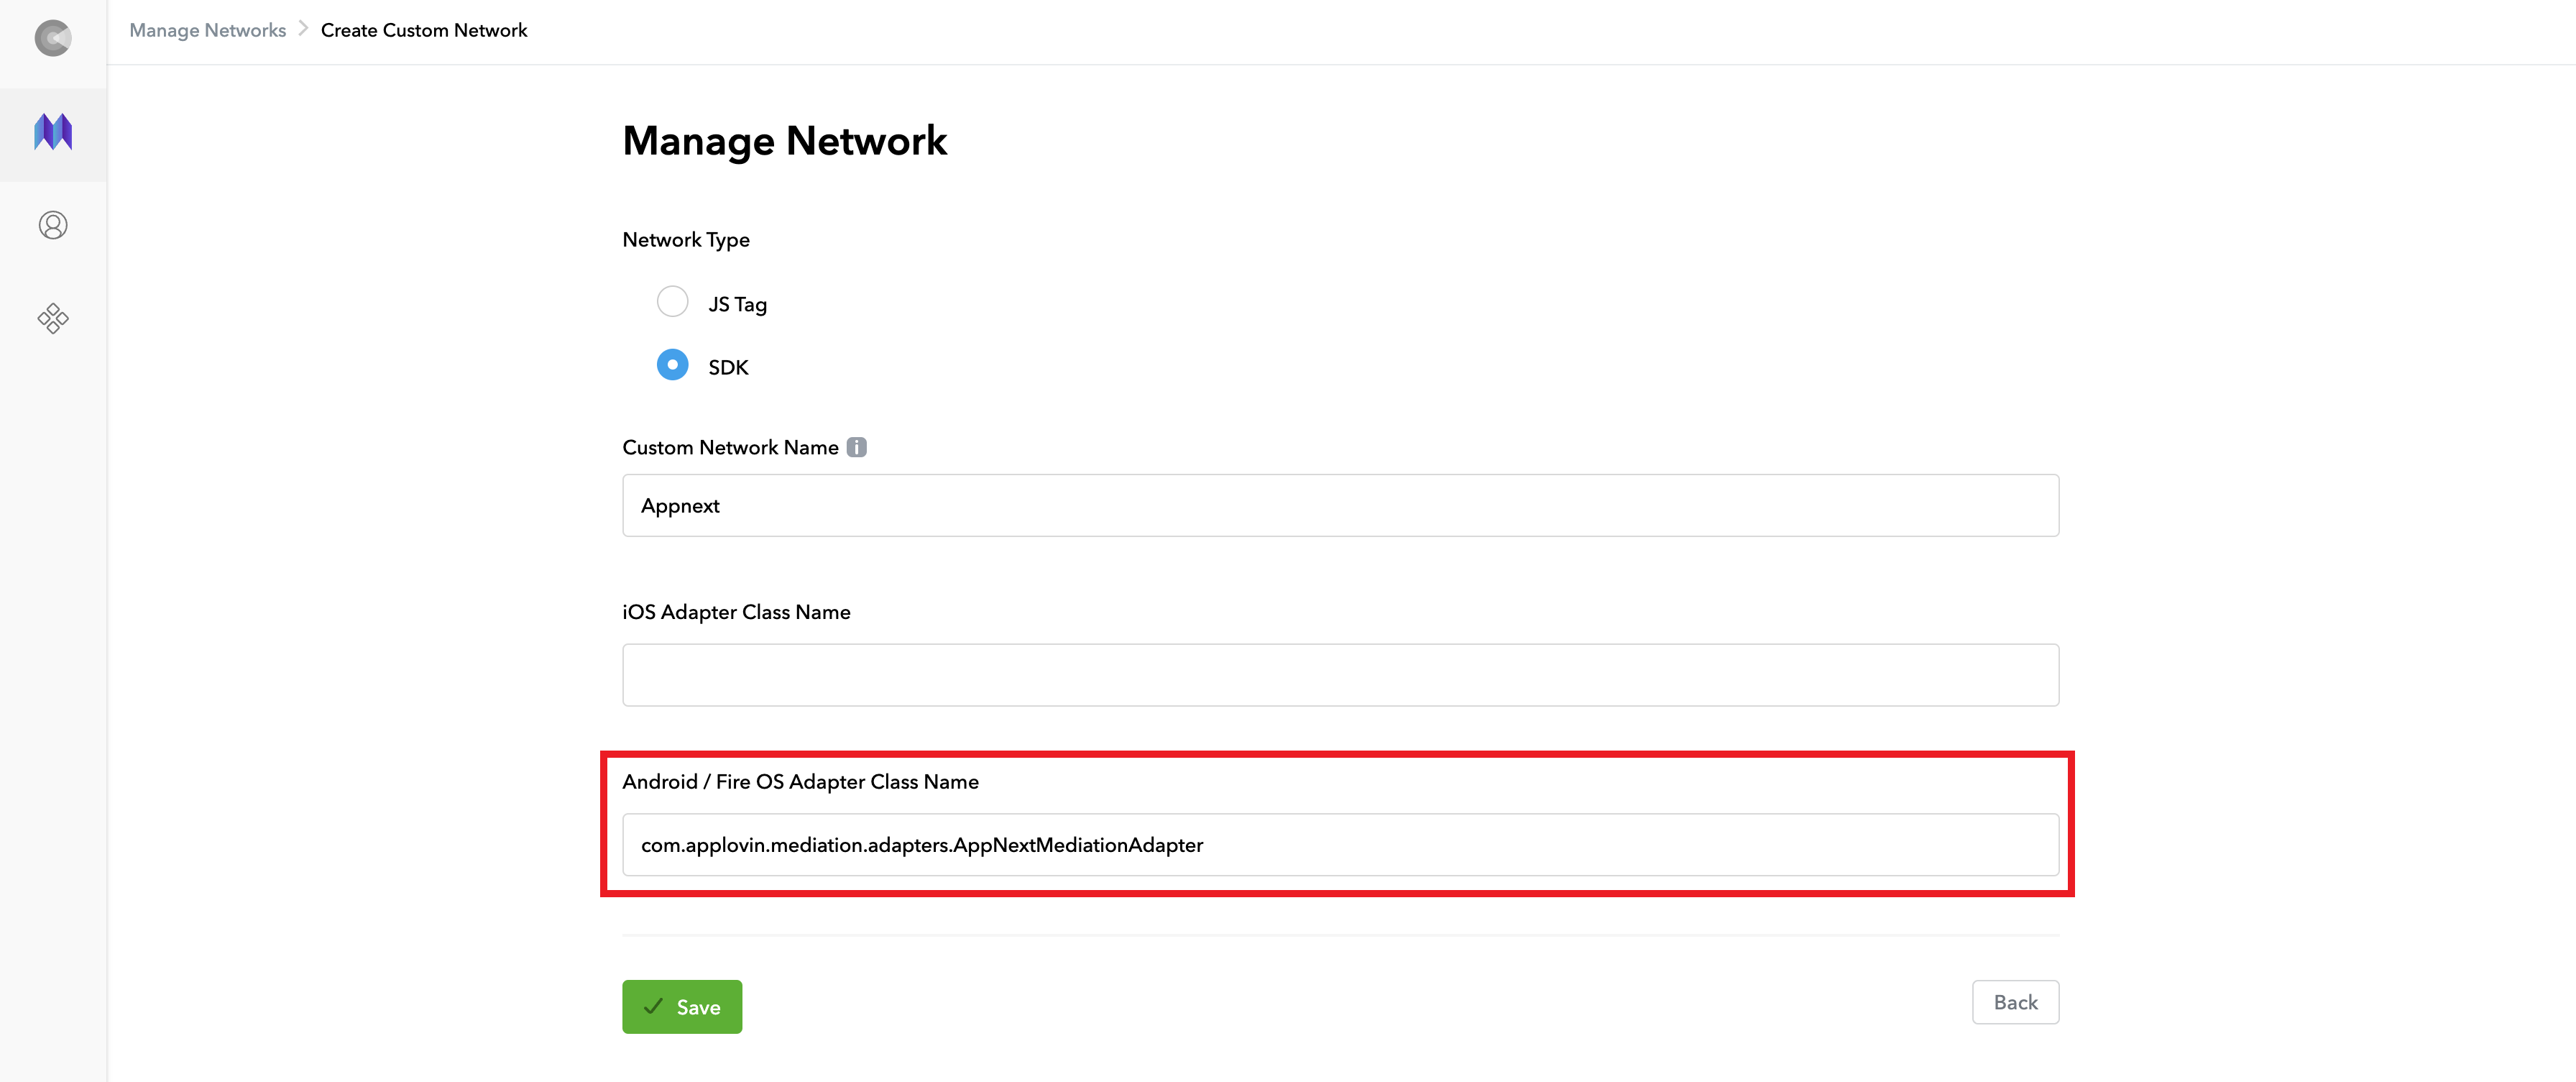
Add the information about your custom network:
• Network Type: choose SDK.
• Name: Appnext
• Android Adapter Class Name: com.applovin.mediation.adapters.AppNextMediationAdapter
Step 4: Create your Ad units
Go to MAX > Mediation > Manage > Ad Units and create the ad units for which you want to add Appnext as a custom SDK network from the “Create an ad” button.

We support the following ad units:
- Banner
- Rewarded
- Interstitial
- Fullscreen video (set as Interstitial ad type)
Define the Ad unit according to your preference:
1- Name the Ad unit
2- Choose the platforms and add your package name or bundle ID
3- Set the Ad type
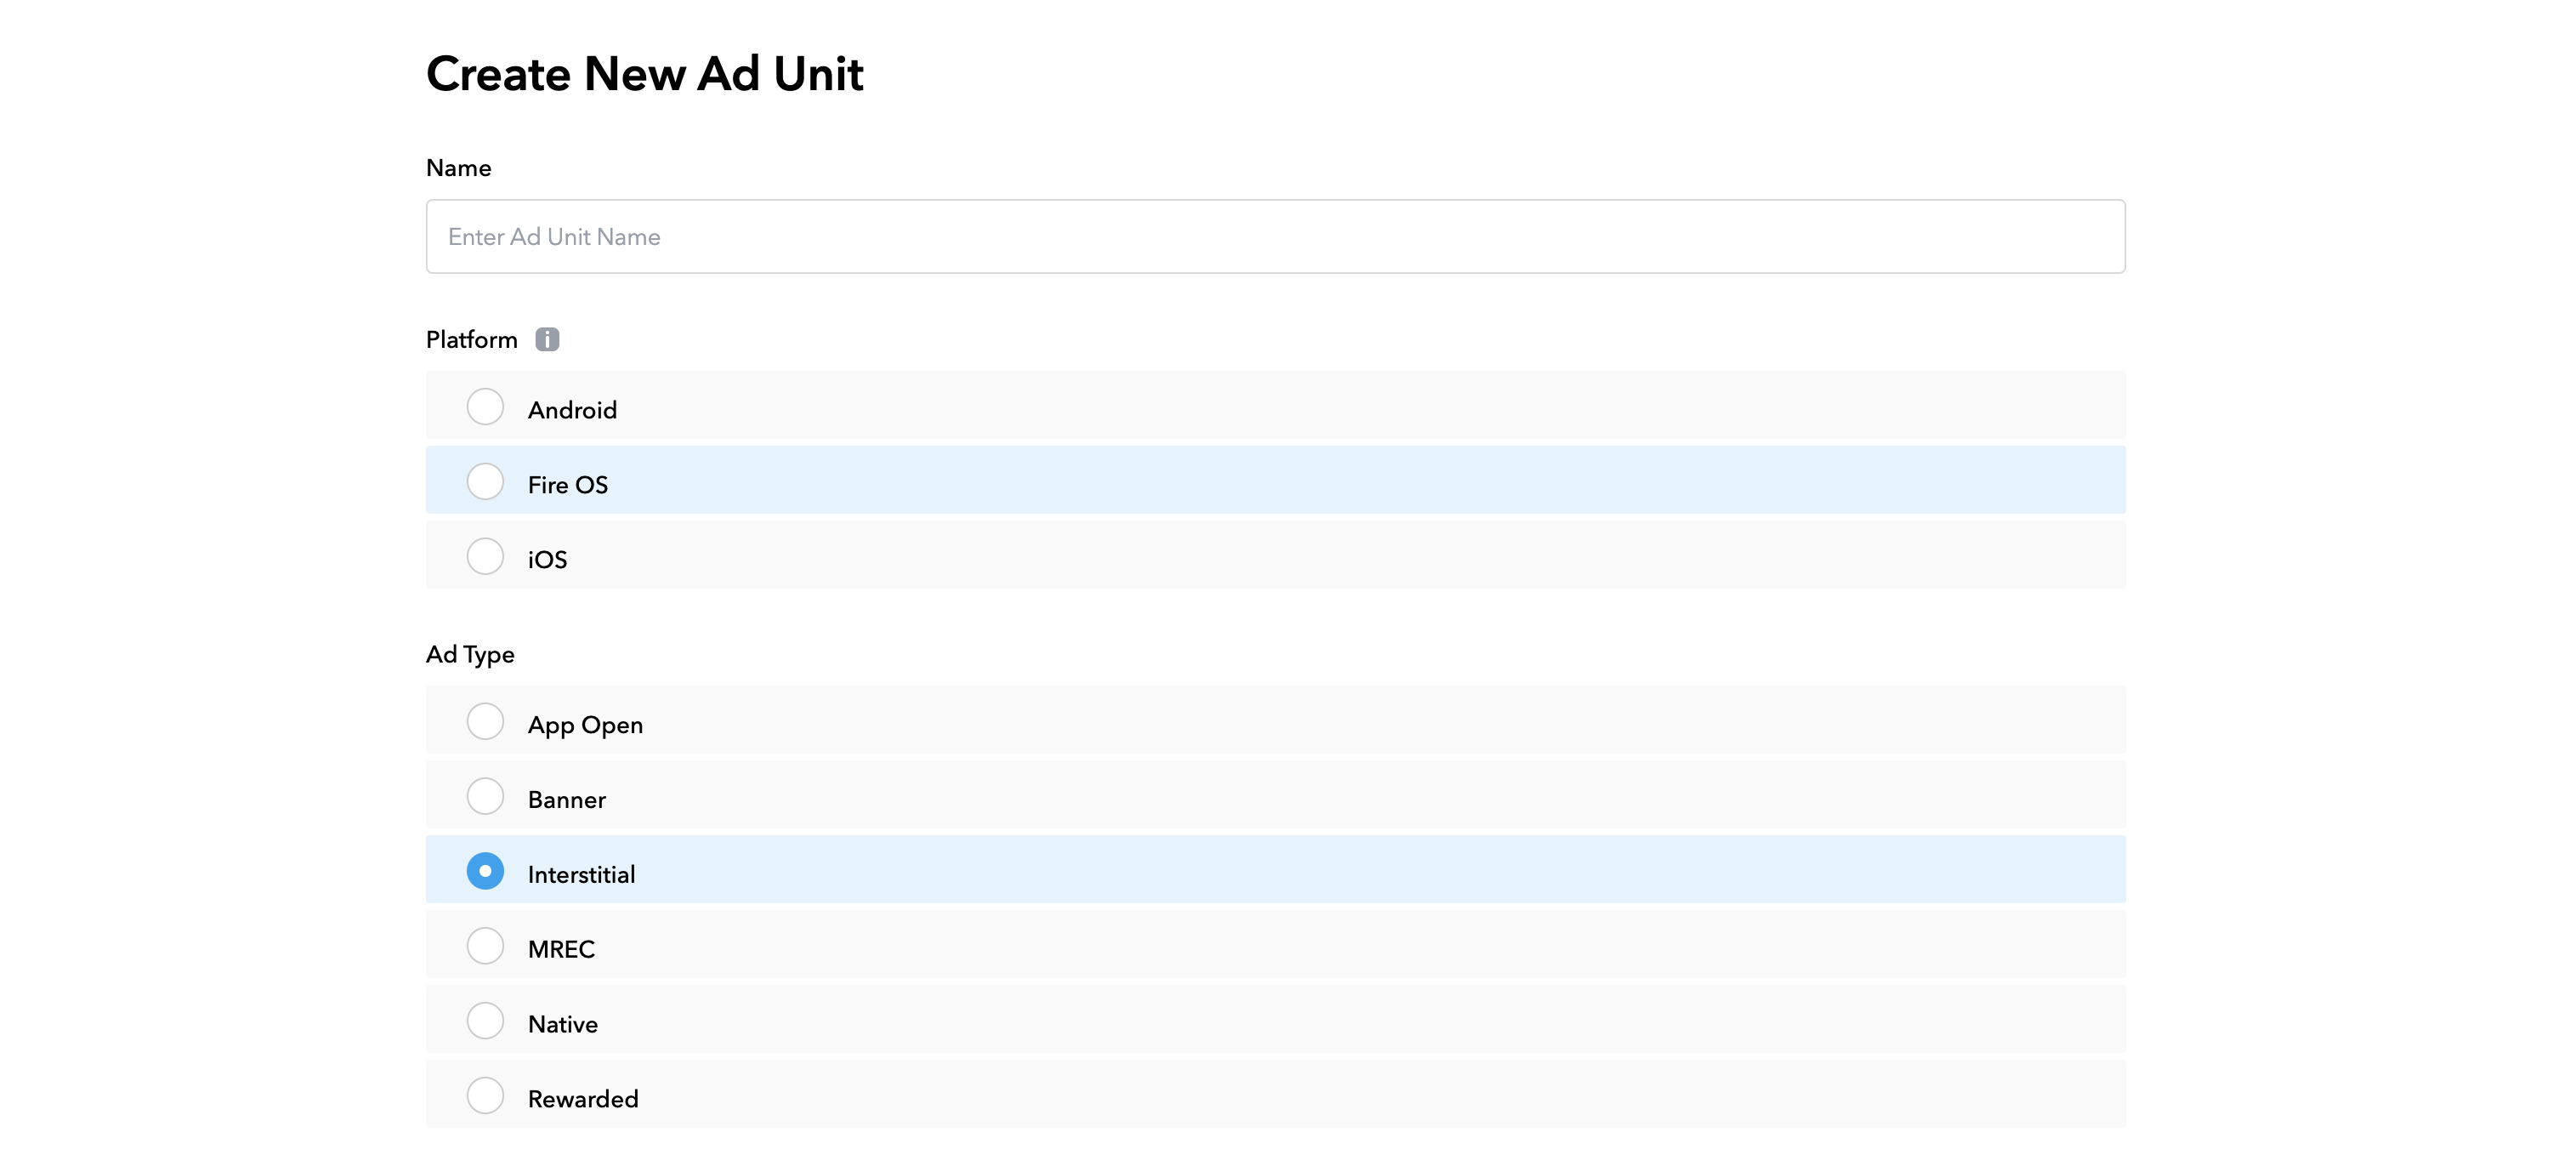
If you create a Fullscreen video ad unit choose Ad type interstitial
4- Set your default waterfall to the ad unit
5- Enable the “Appnext” Custom Network and add it to the waterfall.
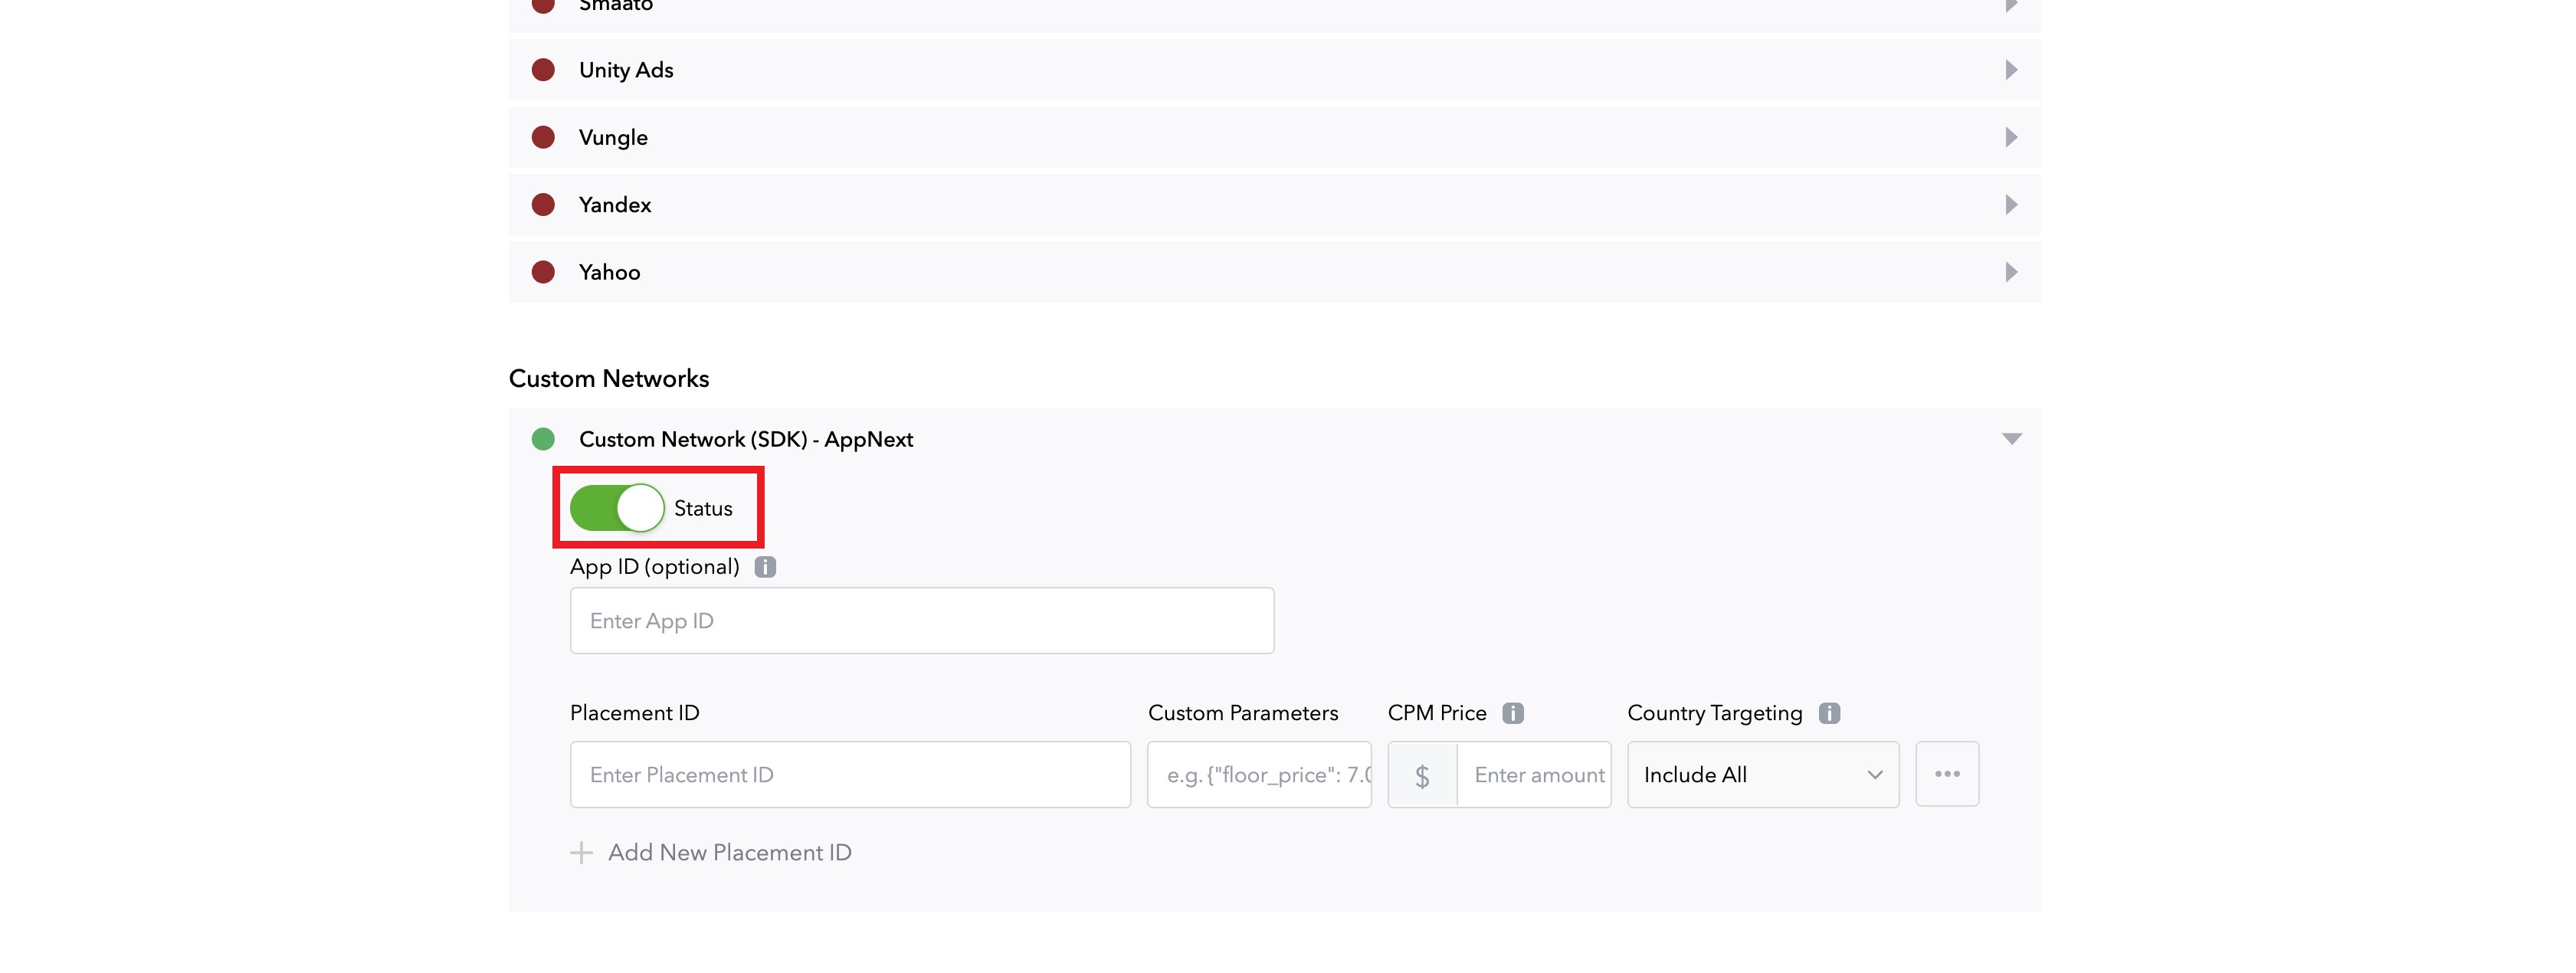
Set the relevant information for each placement:
- App ID (optional)
- Placement ID – as you have from AppNext

- Custom Parameters (optional)
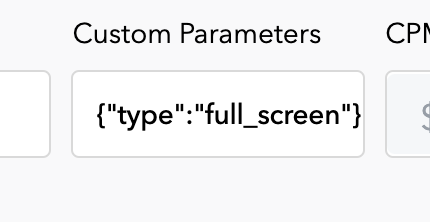
If you create a Fullscreen video ad unit, add the following custom parameter:
{"type":"full_screen"}
- CPM price
- Country targeting
- Additional settings as for your preference (Frequency capping and Bid floor)
6- Click SAVE. Changes will load after 30-60 min

Updated almost 3 years ago